Recently I installed the IBM WebSphere Application Server from scratch so that I could look at the
OSGi support for enterprise applications available in WebSphere. Google was not my friend in this instance - I couldn't find a quick summary of the instructions for installing the WebSphere Application Server anywhere. It is actually all quite easy, not to mention free. In this post I'll provide a brief overview of the steps and links to download sites. If you want more detail, look
here for information on every supported operating system. I used an unsupported operating system (Ubuntu**) and for the purposes of experimenting with the OSGi support this works just fine. Although I use Linux commands throughout this, the same thing will work on Windows with the appropriate modifications to paths and exchanging .bat for .sh files.
There are three steps:
- Install the WebSphere Application Server Version 7
- Install the version 7.0.0.7 Fix Pack
- Install the Alpha OSGi Feature Pack
1. Install the WebSphere Application Server Version 7
This is free for development use and all you have to give IBM is your name and an email address, which they will not use unless you check the boxes saying that you want to be contacted. You will also have to read and accept some license terms. The link you need is
here, there are Windows and Linux downloads, no Mac version (sorry). You will need version 7, and the download is 800 MB so you need to allow plenty of time and make sure you have enough disk space.
Installing is straightforward. Extract the file you downloaded (it will be called something like was.cd.7000.wasdev.nocharge.linux.ia32.tar.gz). In the top level directory you will find a 'launchpad' file. Launch the installer like this:
sudo ./launchpad.shThe screens are fairly self explanatory, just make a note of where you install the AppServer (default on my system is /opt/IBM/WebSphere/AppServer) and, if all you want is an experimental installation, I suggest not configuring security. I'll refer to the place that you installed the AppServer as WAS_HOME for the rest of this post.
Skip the final screen asking if you want to launch the AppServer, it's better to get used to the command line. Change directory to WAS_HOME/bin, then run
sudo ./startServer server1this will start up the server. To shut it down again,
sudo ./stopServer.sh server12. Installing the 7.0.0.7 Fix Pack.
This is a two step process. You will need to download both the fix pack and an installer. The steps are detailed
here. If this is a new installation all you need are steps 5 and 6.
The installer that you download will be called something like 7.0.0.7-WS-UPDI-LinuxIA32.tar.gz and the fix pack will be 7.0.0-WS-WAS-LinuxX32-FP0000007.pak. Extract the installer somewhere temporary, then
cd UpdateInstallersudo ./installThe screens which follow will take you through installing the installer and then onto installing the fix pack. The screens are easy to follow - you will just need to point the installer to the location of the fix pack at some point.
After installing, try stopping and starting WebSphere again to make sure everything has gone according to plan.
3. Installing the Alpha OSGi feature pack
You will need to download the feature pack from
this site. Select the 'Download' tab then scroll down till you find 'Download OSGi Applications Alpha'. You will have to register and accept another license, then you should find a screen that allows you to download 'OSGi-Applications-Open-Alpha-20100111.zip'. Copy the .zip file into the WAS_HOME directory and then extract it. To complete the installation you will need to run:
cd WAS_HOME/feature_packs/aries/bin/
sudo ./complete_installation.sh
sudo ./augmentProfile.sh AppSrv01This assumes that 'AppSrv01' is the name of the profile you want to use; if this is stand alone test installation using AppSrv01 will be fine.
Finally - restart the AppServer, and point your web browser at http://localhost:9060/ibm/console, which will give you the WebSphere admin console, like this:
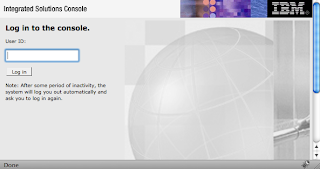
If you didn't set up security you will just be able to click the 'Login' button, if you did you will have to enter an ID and password.
You should now be in a position to experiment with the OSGi Alpha as described
hereFinally...
This is all quite easy to work through but there are some additional things that it's helpful to know:
You will find the log files here:
WAS_HOME/profiles/AppSrv01/logs/server1
the one you are most likely to want if things don't go according to plan is SystemOut.log.
OSGi bundles are cached here:
WAS_HOME/profiles/AppSrv01/config/bundlecache
It can be useful to look and see what is in there.
The OSGi samples (and their source code) can all be found here:
WAS_HOME/feature_packs/aries/
** If you do use Ubuntu to run WebSphere you will need to make sure that /bin/sh is linked to /bin/bash, not /bin/dash.

